|
|||
|
Jeep FAQ How-To Articles Quick Reference Product Reviews My Buildup Random Home |
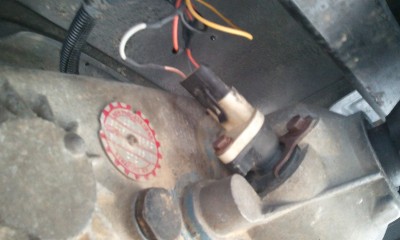
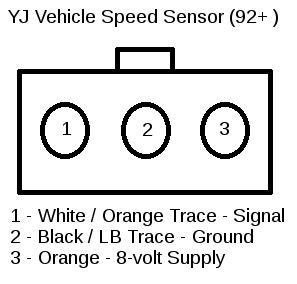
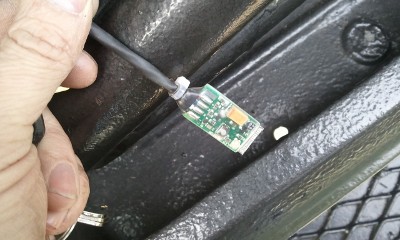
So most of us suffer from an inaccurate speedometer, due to various reasons (gear ratio or tire size changes). Most people would buy a new speedometer gear and with any luck an educated guess on the tooth count would make your speedometer reasonable accurate. The problem is using a chart doesn't always work, just because it may say you need 38 tooth gear for 4.10s and 31" tires, your tires may not measure exactly 31". Then the cheap gears are $35-40+, the Jeep gears are $75-80+. Even worse yet, if you are like me and switch back and forth between tire sizes, or later switch to a different size you would need another gear. There is a plug and play box sold for $200+, but I'm way too cheap for that. So I got the idea to use a speedometer correction box that is typically used on motorcycles. All the ones I've found are similar in price, but have some major differences. After installing several brands of these, I'm of the opinion the SpeedoDRD from 12oclock Labs is the best one out there. I sent a couple emails to Brooks at 12oclock Labs and decided to pick up a universal kit to install on my Jeep. This device works by modifying the signal your speed sensor sends to the ECM. The easiest way to install this is to splice/cut the wires the at the speed sensor itself (This also ensures the mileage on the ECM and Odometer match on newer vehicles). The speed sensor is on the back of the transfer case, only sensor on the tail housing by the rear driveshaft.  On the YJs the plug should be like this. However this is easy to double check with a multi-meter, and the key on. I briefly flipped through a few of the TJ FSM and the newer TJs have a slightly different plug (pins should be the same though), with different 8+ volt supply and ground wire coloring, but the Signal wire is still White with an orange tracer.  The SpeedoDRD instructions are done very well. The only wire you need to actually cut is the signal wire. The power and ground you can just tap into. The SpeedoDRD can handle 5-12 volts, so you can attach the power and ground to any power or ground, I just chose to use the speed sensor wires. The SpeedoDRD also comes with heat shrink and nice weather tight connectors. Personally I prefer to solder every connection and heat shrink everything. SpeedoDRD to a YJ Speed Sensor -Red wire to Orange Wire (8+ volts) -Black wire to Black wire (Ground) -White to White / Orange Tracer Wire Speed sensor plug Side (Signal in from vehicle) -Blue to White / Orange Tracer Wire Speed sensor vehicle Side (Signal out to ECM/Gauges) Now this unit is pretty much water proof, I was told I could even submerse it if I wanted, so I could leave it under the vehicle if I wanted. However I chose to route it into the cab so it would stay dry and it was easy to adjust.  The SpeedoDRD is very simple to setup. Start by figuring out how much your speedo meter is off (I recommend using 50-60 MPH as your test point). Using a GPS I noted my speedometer was reading 80 when I was actually only doing 63 MPH. This meant I was roughly 27% off, which is a good starting point. Now time to enter those settings into the SpeedoDRD (The instructions also covers this, and the other menu options). -Turn the Key on. -Press the button on the SpeedoDRD and hold until the red light comes on, the flashes are the menu options. Release the button after it flashes 5 times. -The lights should not pulse between green and red. -Now press and hold and it should alternate between green and red. Release on green if you need a positive percentage, red if you need negative. My Speedometer was fast, so I released on red for negative percentage. -The lights should not pulse between green and red. -Now press and hold until you reach the number of flashes for your correction percentage. I was entering 27.0, which means I let the light flash twice, then release. -The lights should not pulse between green and red. -Now time to enter the second digit, which in my case was 7. Press and hold till it flashes 7 times. -The lights should not pulse between green and red. -Now the decimal. I was entering 0, which is done by 10 flashes. -Both the green and red light should now come on letting you know your setting was stored. Don't be surprised if you still need to make a minor adjustment. I ended up going to 22.0% to get my speedometer dead on. The biggest advantage to this really is you can make your speedometer exactly right, not just reasonably accurate. Not to mention you can always adjust it, meaning you won't be buying a new speedometer gear every time you switch tires.
© Copyright 2006 - 2025 Mike Lee
|
|
|